
Podcast: Play in new window | Download
Subscribe: RSS
In today’s Podcast Episode/post, I talk about how you can increase your WordPress site speed, with minimal effort, for free.Be sure to listen in to the Podcast, as I will walk you through the steps below, in addition to providing the details behind the recommendations.
I’ve included screenshots of the steps mentioned in the Podcast and links to the tools, for reference below.
As always, before installing any plugins or making changes on your website(s), be sure to take a full offsite backup.
The plugin I recommend for backup and restore is the Updraft Plus WordPress Backup plugin. It is free for normal use and it works great.
I recommend you utilize DropBox as the offsite storage option. If you sign-up for a free DropBox account through my affiliate link, we will both get an additional 500MB of free storage. Bonus!
In addition, BEFORE you attempt any of the steps below, I recommend you run a quick speed test of your site at GTMetrix.com, or your favorite speed test site. You can download a full PDF report as a baseline, for later comparison.
Steps For Speeding Up Your WordPress Website
CloudFlare Sign-Up and Config
Sign-up for a free Cloudflare account and then sign-in.
Click the +Add Site button, enter your URL and then “Begin Scan”.
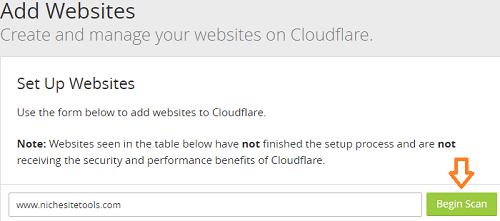
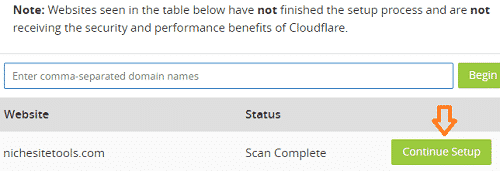
After the scan is complete, click the “Continue Setup” button.
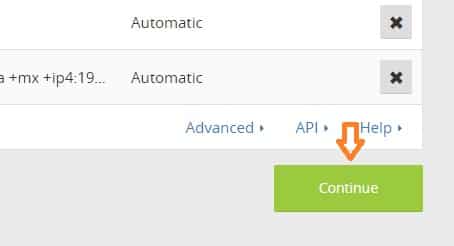
Click “Continue” on the DNS verification screen.
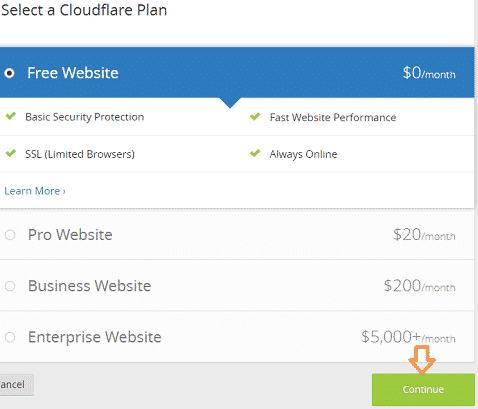
Scroll down and choose the Free Website plan and click “Continue”.
Take note of the DNS servers you will need to change to and click “Continue”.
Note: the DNS servers shown in the image below may differ, be sure to use the ones shown in your own account.
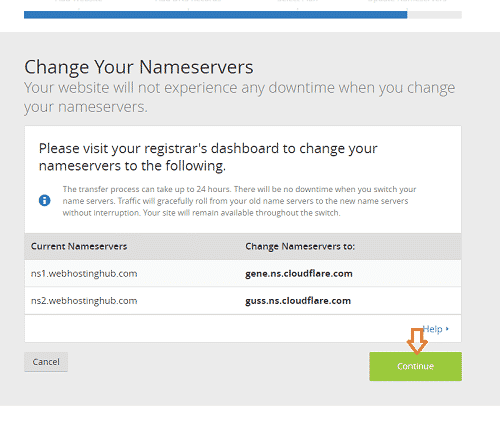
Login to your Domain Name provider and change your existing DNS servers to match the ones referenced in the step above.
I utilize and recommend NameCheap for Domain Registration.
Below is a screenshot showing where you would make those changes on your NameCheap account. Be sure to click the green “Save” check mark.

At this point, it will take a little bit of time for the changes to propagate throughout the internet. They mention to allow up to 24 hours, but usually an hour is long enough.
After some time has passed, return to your Cloudflare dashboard and click “Recheck Nameservers”.
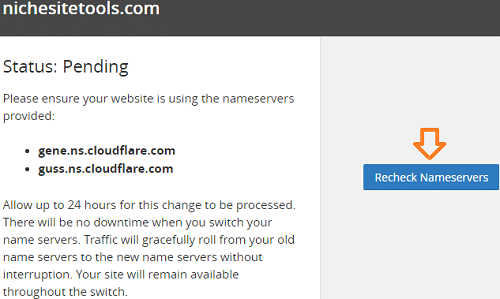
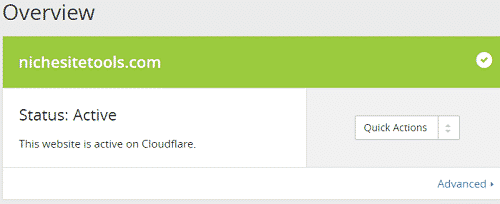
Once that is successful, you will see the screenshot below showing that your free CloudFlare account is now fully active.
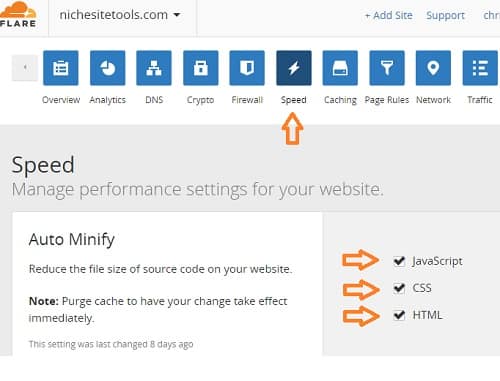
Now click on the “Speed” tab along the top and within the “Auto Minify” section, click the check boxes for “JavaScript, CSS and HTML”.
Scroll down to the “Rocket Loader Beta” section and select “Automatic”.

Switch over from the “Speed” tab to the “Caching” tab.
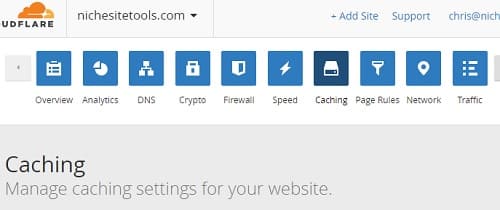
Scroll down to the “Always Online” section and turn this On.

That’s it for the options within CloudFlare. Now we’ll install and enable the Imagify plugin for optimizing and shrinking down images.
Installing and Configuring Imagify
Go to your WordPress Dashboard, select “Plugins” and “Add New” and then type in “Imagify”, select “Install Now” and then click on “Activate”.
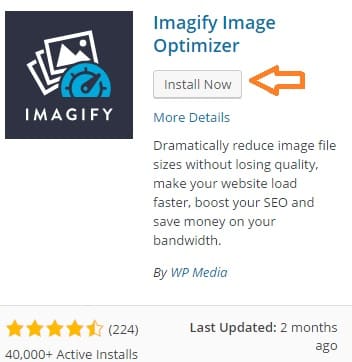
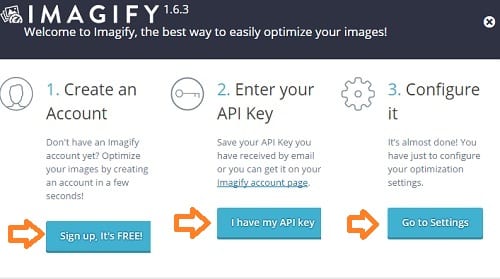
After clicking on “Activate”, you’ll see the screen below. Click on the “Sign up, it’s FREE!” button, enter your email address and you will receive your API key right away.
Then click on “I have my API key” and copy/paste the API key into the box and click “Connect Me”.
Then click the “Go to Settings” button.
On the “Settings” page, choose which level of optimization you want. I stuck with the default level of “Aggressive” and just scrolled to the bottom and chose “Save and Go to Bulk Optimizer”.
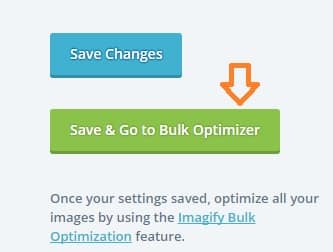
On the “Bulk Optimizer” page, scroll down and select your desired level of compression. “Aggressive” is the default. Then click “Imagif’em all”.
That will optimize all of the existing images on your website automatically, without any intervention on your part, while also saving the original.

When that is complete, you can then run another speed test of your site and compare the results.
Optional: Installing and Configuring JetPack Photon
The JetPack Plugin, from the folks at WordPress, has a bunch of useful features. Today, we’re just going to mention the “Photon” option.
Photon optimizes how images are served up. Enabling this one additional feature increased my SpeedTest score from an 84% (B) rating to a 90% (A) and decreased my site load time as well.
Here are the steps, if you decide to enable Jetpack Photon.
Go to your WordPress dashboard, select “Plugins” and choose “Add New”. Type in Jetpack and click “Install Now” and then “Activate”.

In order to utilize Jetpack you will need to connect the Jetpack plugin to WordPress by logging in with your free WordPress account. If you don’t have one, you can create one.
After you’ve connected the plugin to WordPress, you click over to the “Appearance” tab and enable the Photon option.
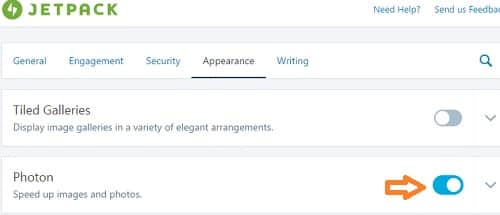
That’s it! Your site should now perform better than before.
Conclusion
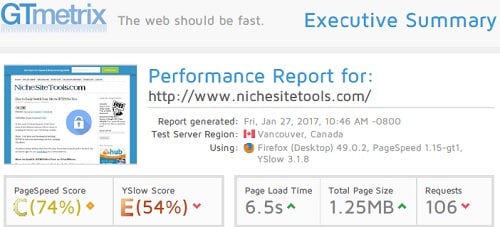
Here is a comparison of my results from GTMetrix.com before and after making the changes above.
Speed Test Results Before
Speed Test Results After
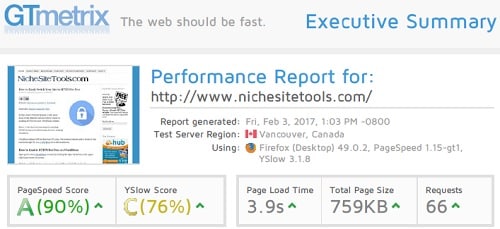
I have utilized the GTMetrix site for the past several years to check load times and tweak my site(s) and this is the first time I’ve ever received an A (90%) rating on PageSpeed Score. I was quite impressed.
In addition, Page Load Time went down 40% from 6.5 seconds to 3.9, which is a pretty dramatic decrease.
As I mentioned in full detail on the Podcast Episode, because all of our websites are unique, your individual results may vary. However, I hope you will achieve similar, positive results.
Optimizing and speeding up your website can provide a better experience for site visitors and better site speed is a positive ranking factor in Google’s algorithm.
The few tweaks mentioned above can go a long way towards helping with customer satisfaction and rankings over time.
I truly hope this post and Podcast Episode were helpful and wish you all the best with your niche website adventures!
